

I have seen a trend in the blogging and instagram world where items are photographed on white backgrounds. I love the way this looks and have integrated this type of photo into my own blogging and social media from time to time. As a professional photographer, I wanted to share a few tips on how to achieve this look – without using any fancy or professional gear.
1. Find a white, matte surface – I use a white foam poster board that I bought at an office supply store. White foam boards are probably one of my favorite inexpensive photography ‘gear purchases’ (they can be used as a reflector in other situations too!)
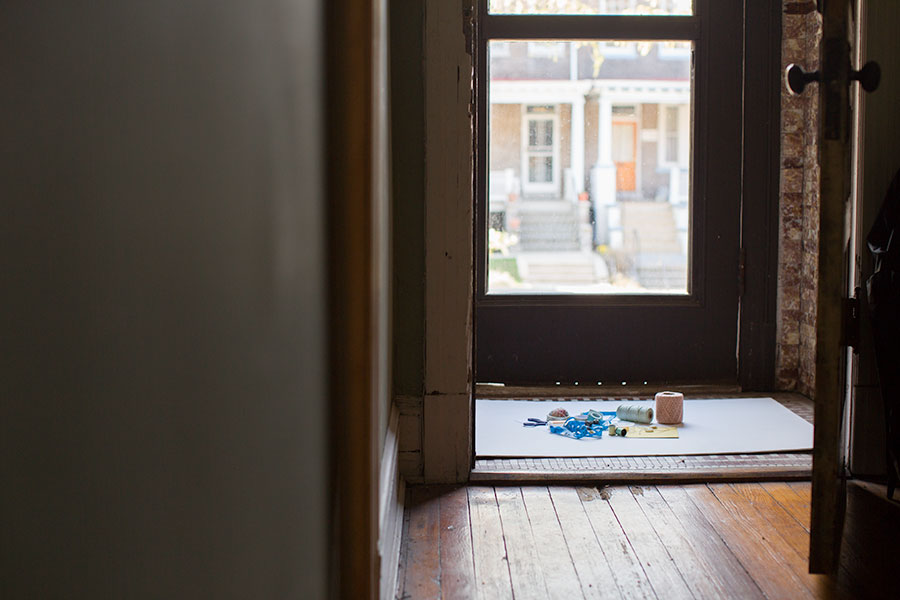
2. Find a large window – I use my foyer as my ‘studio’ for this type of shooting. Shooting by a large window gives you enough light to shoot indoors and creates a lovely light. l I also prefer to set the white board on the ground (rather than a table) because I can shoot the items from a higher angle. I also like the way the shadows form around the objects when placed below our light source (aka the window).
3. Grab your camera. I used my Canon 5D Mark iii, but you can use whatever camera you have – even your iphone! The great thing about using these photos for blogging or instagram is that they do not necessarily have to have a high resolution like you would need for print.
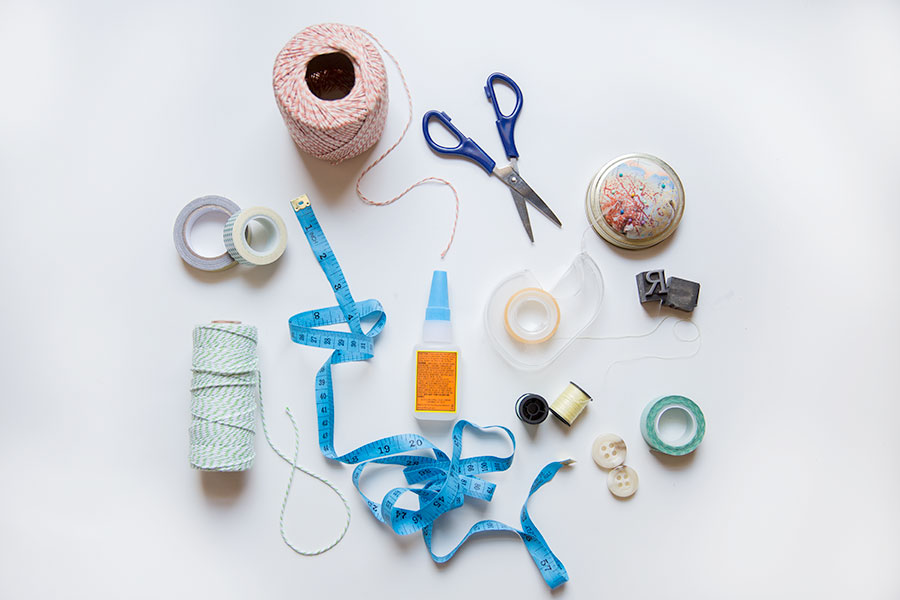
4. Don’t be afraid to add some texture to your photo – I personally think that adding the graph paper and envelope to the image added a little more drama than the white background alone. I also played around with unraveling the thread and twine – have fun with it!

The plain background (below) is nice too, but I personally like adding some texture as well.
5. Turn off all other lights in the room! This is very important. In the photo below I left a lamp on the room where I was taking these images. Do you see the different light temperatures? In the bottom left corner you can see the warm, orange light from the lamp and in the top of the photo you can see the blue window light. This is especially evident in the shadows. Doesn’t this just make the photo look ‘muddy’?

6. Edit the photo. After taking my photos I upload them and edit them in Adobe Photoshop or Adobe Lightroom. Don’t have either of those? Iphoto has a lot of features that I use for these photos. I would play around with the exposure, highlights, and contrast – in iphoto this is located in the ‘adjust’ tab of the editing window.
7. A little more editing. Although we did our best to keep a correct ‘white balance’ while we were shooting (aka we only used the window light and kept our light temperatures the same) It is good to check our white balance – or make sure that our white background is actually white, not orange or blue from our light source. You can do this with ‘dropper’ tool found in both Lightroom and iphoto.
8. Share your photos!
Have you ever shot photos with a white background for your blog or social media? Do you have any questions? Do you have any other tips to add? Share them in the comment section. I would love to answer any questions you may have!
Think this post was helpful? Feel free to share with your blogger and instagramming friends!
ooh, I should get a nice foam board! I just use paper 🙂
The foam board is great! It gives a nice big space for taking photos and it pretty sturdy.
I will definitely be putting these tips to use 🙂 Thanks for sharing Erica!
Glad to hear that they were helpful for you! Looking forward to seeing what you create!
Thanks for sharing these tips Erica! My technique is very much a work in progress. Ah the challenges of photographing well in small spaces. This is great!
Just for you 🙂 Thanks for letting crash your space today!
I keep a piece of foam board handy as well! My space is light-challenged at times, and the white background really helps. Good tips!
I am glad someone else keeps foam boards handy!
This is super helpful! Thanks!
Glad you enjoyed it!
Hi Erica, what a valuable photo tip. I have not done much shooting with white background, but this make me want to experiment. This is such a great post. I look forward to most photo tips posts from you.
Thanks, Marisol! I learned so much about photography through the generous tips and advice of photographers/bloggers and would love to give tips too! I just need to come up with ideas on what to teach! Glad you enjoyed it!